Flash Button Tutorial 2
2 posts
Page 1 of 1

Quick Profile
Information
Posts: 2870
Joined: Mon Jul 27, 2009 11:58 am View Full Profile
Hi All
Here is another Tutorial on Creating Cracking Button rollovers in Flash
I have created 4 Buttons in Photoshop and imported them into the Flash Library
1. At the Flash stage with a Blank Document open
2. press Ctrl+F8 to open the CREATE NEW SYMBOL Dialog
3. Choose button and give it a Name and click ok
4. you will be presented with the Button Stage and if you look at the Top of the Stage you will see UP >OVER >DOWN > AND HIT (* These are the 4 states of your button )
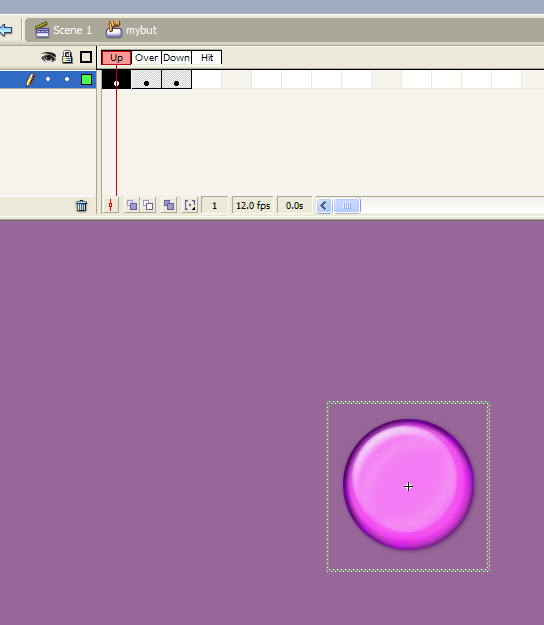
Click once in the UP STATE and the square should go 'Black' ( that means its selected ) Now drag a Button onto the stage area and center it Horizontal and Vertically ( with the align pallete )
Like the pic below
![Image]()
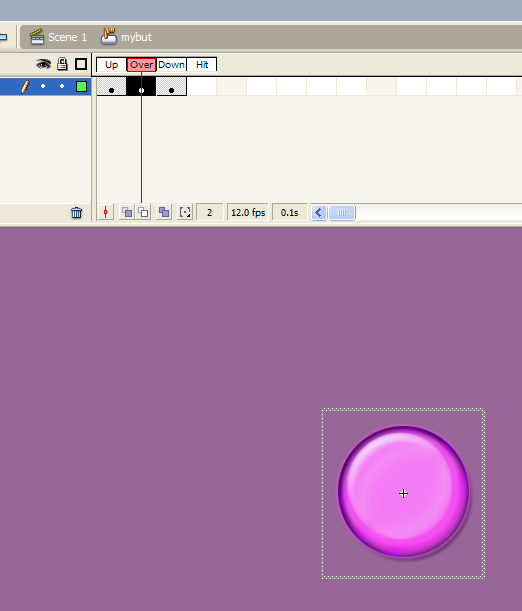
Next RIGHT CLICK in the OVER STATE of your Button and CHOOSE INSERT BLANK KEYFRAME from the dialog, this will insert a Blank Keyframe and the button on the stage will dissapear ( because we have inserted a blank keyframe, and that button was in the UP STATE not the OVER STATE )
Now drag your button that you want in the OVER STATE onto the stage and CENTER IT LIKE THE ONE BEFORE
Like the Pic below
![Image]()
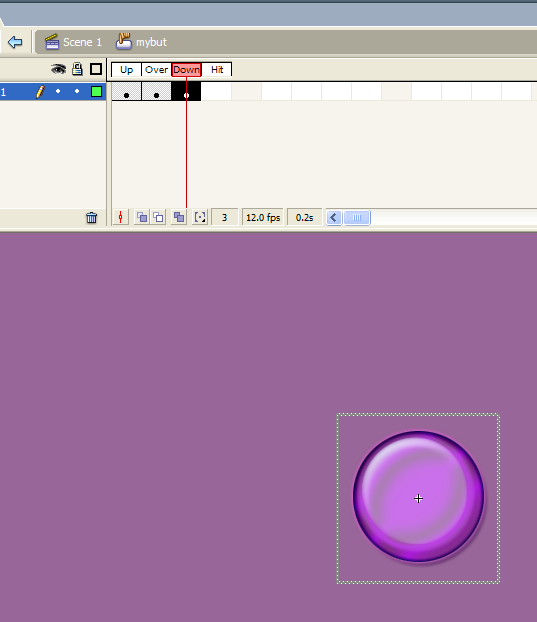
Next do the same for the DOWN STATE of your Button
Like the Pic below
![Image]()
Next do the same for the HIT STATE of your Button
Like the Pic Below
![Image]()
Right now that includes the 4 states of your Button cooll;
*Now we are going to add some TEXT to the Different States of the Button so that when your mouse pointer goes over the Button it will display text at the different states.
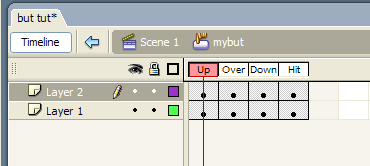
* If you look at this pic Below you will see that i have added a New Layer above the button states
![Image]()
And You add TEXT in exactly the same way by ADDING A NEW LAYER ABOVE THE BUTTON STATES
Then select the first State of the second Layer ( the UP STATE) AND CLICK IT TO SELECT IT
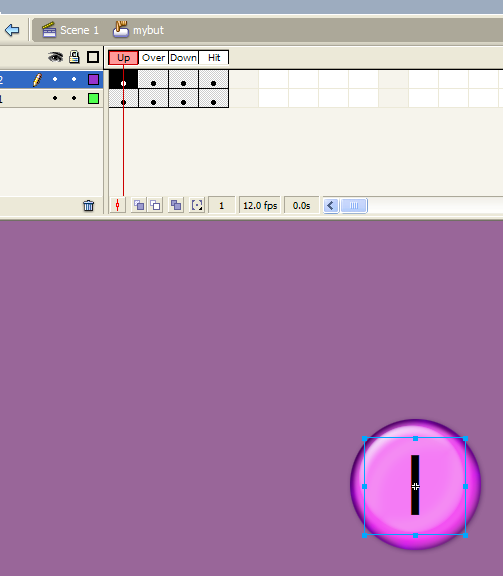
Then by using the Text tool from the tools pallette, Click and drag on the stage or over your button then type the text you want the UP STATE to display
Like the Pic Below
![Image]()
Again you follow the same procedure as before and RIGHT CLICK on the NEW LAYERS OVER STATE and choose INSERT BLANK KEYFRAME from the list, Then by Using the TYPE TOOL from the TOOLS Pallette Type your OVER STATE TEXT that you want to display....
Follow this above for the DOWN + HIT STATES (Dont forget to CENTER THE TEXT ON THE BUTTON on EACH STATE as you add the TEXT.
*Tip.. If you look at the pictures above you will see over the Top of the UP STATE their is a SCRUBBER ( ITS RED) You can click and hold your mouse down and move the SCRUBBER back and forwards to see the states of your Button in all its glory, this is really handy to make sure that you have done it properly and everything is lined up.
Right that is it cooll;
If you click on the SCENE 1 TAB at the top you will be taken back to your Flash Stage ( it will be empty as you have not added the Button to the stage yet)
Drag your button from the LIBRARY ONTO THE STAGE AND PRESS CRTL+ENTER TO DISPLAY IT
Job Done wahooo; wahooo;
YOU CAN DRAG THE BUTTON AS MANY TIMES AS YOU LIKE FROM THE LIBRARY on to the Stage and reuse it, also if you have another FLASH Document open and want to use the button in another Flash Document all you have to do is Click the button so it is selected and then Copy and Paste it into your Other Document and it will keep all the states intact..
Hope this is usefull to everyone
Happy Button States 8-) cooll; wahooo;
Chris
Here is another Tutorial on Creating Cracking Button rollovers in Flash
I have created 4 Buttons in Photoshop and imported them into the Flash Library
1. At the Flash stage with a Blank Document open
2. press Ctrl+F8 to open the CREATE NEW SYMBOL Dialog
3. Choose button and give it a Name and click ok
4. you will be presented with the Button Stage and if you look at the Top of the Stage you will see UP >OVER >DOWN > AND HIT (* These are the 4 states of your button )
Click once in the UP STATE and the square should go 'Black' ( that means its selected ) Now drag a Button onto the stage area and center it Horizontal and Vertically ( with the align pallete )
Like the pic below
Next RIGHT CLICK in the OVER STATE of your Button and CHOOSE INSERT BLANK KEYFRAME from the dialog, this will insert a Blank Keyframe and the button on the stage will dissapear ( because we have inserted a blank keyframe, and that button was in the UP STATE not the OVER STATE )
Now drag your button that you want in the OVER STATE onto the stage and CENTER IT LIKE THE ONE BEFORE
Like the Pic below
Next do the same for the DOWN STATE of your Button
Like the Pic below
Next do the same for the HIT STATE of your Button
Like the Pic Below

Right now that includes the 4 states of your Button cooll;
*Now we are going to add some TEXT to the Different States of the Button so that when your mouse pointer goes over the Button it will display text at the different states.
* If you look at this pic Below you will see that i have added a New Layer above the button states
And You add TEXT in exactly the same way by ADDING A NEW LAYER ABOVE THE BUTTON STATES
Then select the first State of the second Layer ( the UP STATE) AND CLICK IT TO SELECT IT
Then by using the Text tool from the tools pallette, Click and drag on the stage or over your button then type the text you want the UP STATE to display
Like the Pic Below
Again you follow the same procedure as before and RIGHT CLICK on the NEW LAYERS OVER STATE and choose INSERT BLANK KEYFRAME from the list, Then by Using the TYPE TOOL from the TOOLS Pallette Type your OVER STATE TEXT that you want to display....
Follow this above for the DOWN + HIT STATES (Dont forget to CENTER THE TEXT ON THE BUTTON on EACH STATE as you add the TEXT.
*Tip.. If you look at the pictures above you will see over the Top of the UP STATE their is a SCRUBBER ( ITS RED) You can click and hold your mouse down and move the SCRUBBER back and forwards to see the states of your Button in all its glory, this is really handy to make sure that you have done it properly and everything is lined up.
Right that is it cooll;
If you click on the SCENE 1 TAB at the top you will be taken back to your Flash Stage ( it will be empty as you have not added the Button to the stage yet)
Drag your button from the LIBRARY ONTO THE STAGE AND PRESS CRTL+ENTER TO DISPLAY IT
Job Done wahooo; wahooo;
YOU CAN DRAG THE BUTTON AS MANY TIMES AS YOU LIKE FROM THE LIBRARY on to the Stage and reuse it, also if you have another FLASH Document open and want to use the button in another Flash Document all you have to do is Click the button so it is selected and then Copy and Paste it into your Other Document and it will keep all the states intact..
Hope this is usefull to everyone
Happy Button States 8-) cooll; wahooo;
Chris
You do not have the required permissions to view the files attached to this post.


Quick Profile
Information
Posts: 1564
Joined: Sun Dec 20, 2009 2:12 pm View Full Profile
Looks cool i cant make buttons like tht i havent PS

2 posts
Page 1 of 1
Copyright Information
Copyright © Codenstuff.com 2020 - 2023