Flash Kaliedascope Tutorial
1 post
Page 1 of 1

Quick Profile
Information
Posts: 2870
Joined: Mon Jul 27, 2009 11:58 am View Full Profile
Hi all
Here we have another Flash Tutorial on How to Make a Kaliedascope Effect
You can use any image you like for this, But just make sure the Image is Square, as it works Great with Square Images and you will get the effect you need.
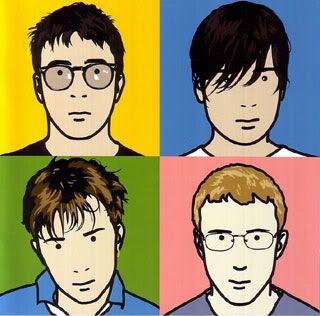
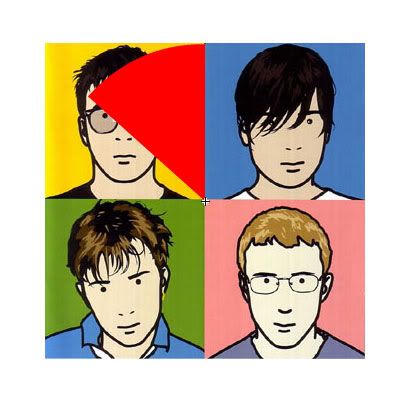
* I am using this image below to show you how to make this cooll;
![Image]()
1. Start a NEW MOVIE in Flash
2. Import the IMAGE you are going to use for this Tutorial into the FLASH LIBRARY (Tip.. Ctrl+L opens the Library)
3. Drag the IMAGE from the LIBRARY onto the BLANK FLASH Stage
4. Click on the IMAGE on the Stage and Press F8 and CONVERT it to a MOVIE CLIP with the name of 'Pattern'
![Image]()
5. Right Click on the MOVIE CLIP and Choose 'EDIT' from the List
![Image]()
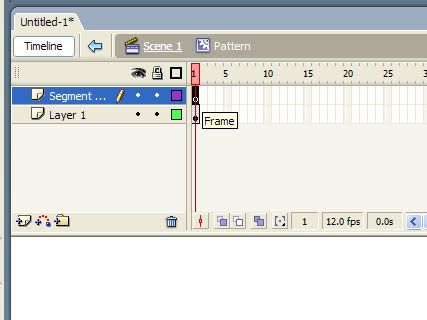
6. Create another LAYER above the one containing your Image and Rename it too 'Segment Mask'
![Image]()
7. Highlight the layer in the Timeline ( *Click on the FIRST FRAME in the Segment Mask Layer )
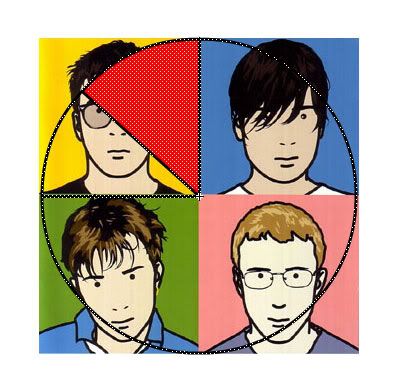
8. And Draw a Circle the same size as your Image ( make sure this CIRCLE is on the TOP LAYER *Called Segment Mask)
*Delete the fill from the Circle so you have the stroke as below
![Image]()
9. Divide the Circle with Lines with the LINE TOOL (Tip..Hold down the SHIFT KEY as you draw with the line tool to get straight Lines)
10. Fill in one Segment with any colour you like, it does not matter as it wont show
11. Delete all the LINES Leaving just the Coloured Segment
![Image]()
12. Move the Coloured Segment on top of your Image and make sure the CENTER of the Segment is on the '+' (Tip.. You can use the Snap and Grid Options as if you are new to Flash it might make it easier for you )
13. Add more FRAMES to BOTH Layers ( between 30 and 60 Frames ) *You do this by clicking on a Frame and Press F5
![Image]()
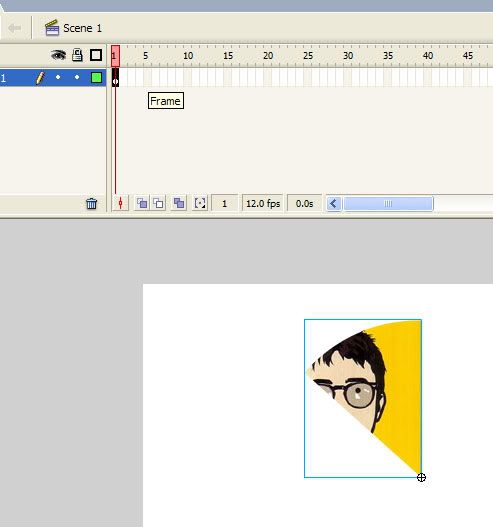
14. Add a Keyframe to the End of the Bottom Layer by Clicking on the Last Frame and press F6 (* Your Image Layer )
![Image]()
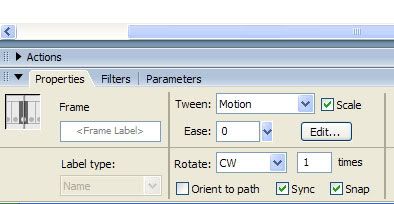
15. Double click on the First Keyframe and RIGHT CLICK IT to SET UP a MOTION TWEEN like in the Pic Below ( * This will ROTATE the Contents of the Layer by 360 degrees Clockwise)
![Image]()
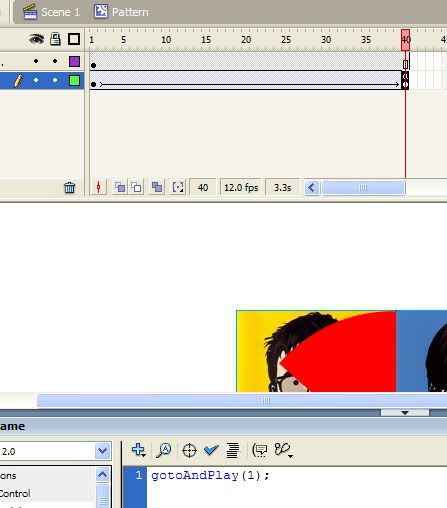
16. Double Click on the KEYFRAME at the end of Bottom Layer (* your IMAGE Layer ) and Press F9 to Open the Actions Tab
17. Add a GOTO Action to Loop back to the FIRST FRAME
![Image]()
Copy and Paste or Type this code into the Action Window
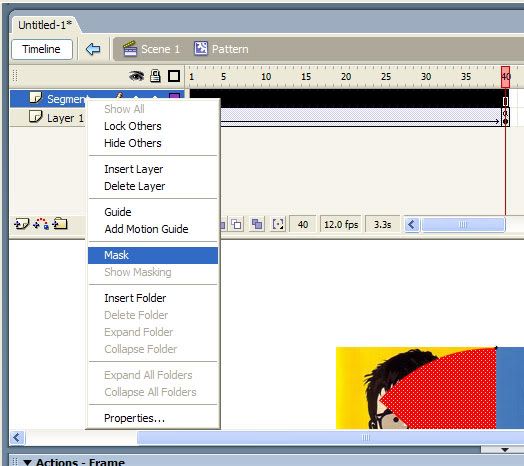
18. Now make the TOP Layer into a MASK by RIGHT CLICKING in the Segment Mask Layer Name and choosing Mask from the Menu
*Check to see that your Movie Clip looks like the Pic Below
![Image]()
![Image]()
19. Now Return to the MAIN SCENE of Your MOVIE (* CLICK on SCENE 1 at the Top Left of the Movie
![Image]()
20. SELECT the MOVIE CLIP (*OnStage) and DUPLICATE IT (Ctrl+D)
21. ROTATE the DUPLICATE by 90 degrees, Repeat TWICE More (*Duplicate the Clip) and Position them as in the Pic Below
![Image]()
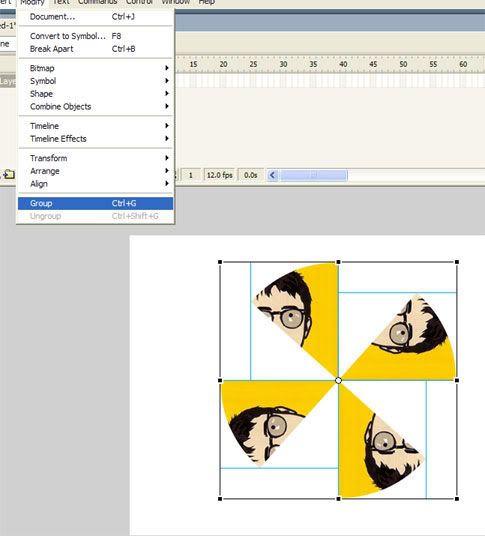
22. SELECT ALL 4 Clips (* By Clicking anywhere off the Stage and hold your Mouse button down and drag over the 4 Clips, then let your mouse button go and they all should be selected ) or Click on one clip and hold Ctrl down and click each clip on the Stage. (*Tip.. Once they are Selected go to MODIFY at the top on the MENU and select GROUP from the List )
23. Duplicate the 4 Selected (Grouped ) MOVIE CLIPS and goto Modify > Transform > Flip Horizontal from the Menu to create a MIRROR IMAGE of the set of 4 clips, Position them like the Pic Below....
![Image]()
![Image]()
Now Press Ctrl+Enter to Test your Kaliedascope Movie, If you are successfull it will work as it should.
Save your Movie to your Harddrive or External drive and press Ctrl+Enter again to Publish your Movie
Goto where you have saved it and double click in the Flash.SWF File to run it.
And thats it, You can now add these to your website or do whatever you like with it.
Hope you all enjoyed this tutorial.
Chris
Here we have another Flash Tutorial on How to Make a Kaliedascope Effect
You can use any image you like for this, But just make sure the Image is Square, as it works Great with Square Images and you will get the effect you need.
* I am using this image below to show you how to make this cooll;
1. Start a NEW MOVIE in Flash
2. Import the IMAGE you are going to use for this Tutorial into the FLASH LIBRARY (Tip.. Ctrl+L opens the Library)
3. Drag the IMAGE from the LIBRARY onto the BLANK FLASH Stage
4. Click on the IMAGE on the Stage and Press F8 and CONVERT it to a MOVIE CLIP with the name of 'Pattern'

5. Right Click on the MOVIE CLIP and Choose 'EDIT' from the List

6. Create another LAYER above the one containing your Image and Rename it too 'Segment Mask'
7. Highlight the layer in the Timeline ( *Click on the FIRST FRAME in the Segment Mask Layer )
8. And Draw a Circle the same size as your Image ( make sure this CIRCLE is on the TOP LAYER *Called Segment Mask)
*Delete the fill from the Circle so you have the stroke as below
9. Divide the Circle with Lines with the LINE TOOL (Tip..Hold down the SHIFT KEY as you draw with the line tool to get straight Lines)
10. Fill in one Segment with any colour you like, it does not matter as it wont show
11. Delete all the LINES Leaving just the Coloured Segment
12. Move the Coloured Segment on top of your Image and make sure the CENTER of the Segment is on the '+' (Tip.. You can use the Snap and Grid Options as if you are new to Flash it might make it easier for you )
13. Add more FRAMES to BOTH Layers ( between 30 and 60 Frames ) *You do this by clicking on a Frame and Press F5

14. Add a Keyframe to the End of the Bottom Layer by Clicking on the Last Frame and press F6 (* Your Image Layer )

15. Double click on the First Keyframe and RIGHT CLICK IT to SET UP a MOTION TWEEN like in the Pic Below ( * This will ROTATE the Contents of the Layer by 360 degrees Clockwise)
16. Double Click on the KEYFRAME at the end of Bottom Layer (* your IMAGE Layer ) and Press F9 to Open the Actions Tab
17. Add a GOTO Action to Loop back to the FIRST FRAME
Copy and Paste or Type this code into the Action Window
Code: Select all
* This Action is not really necessary but it makes for a SMOOTHER Rotation, This is because the First and the Last Frame are the same.gotoAndPlay (1);18. Now make the TOP Layer into a MASK by RIGHT CLICKING in the Segment Mask Layer Name and choosing Mask from the Menu
*Check to see that your Movie Clip looks like the Pic Below

19. Now Return to the MAIN SCENE of Your MOVIE (* CLICK on SCENE 1 at the Top Left of the Movie
20. SELECT the MOVIE CLIP (*OnStage) and DUPLICATE IT (Ctrl+D)
21. ROTATE the DUPLICATE by 90 degrees, Repeat TWICE More (*Duplicate the Clip) and Position them as in the Pic Below

22. SELECT ALL 4 Clips (* By Clicking anywhere off the Stage and hold your Mouse button down and drag over the 4 Clips, then let your mouse button go and they all should be selected ) or Click on one clip and hold Ctrl down and click each clip on the Stage. (*Tip.. Once they are Selected go to MODIFY at the top on the MENU and select GROUP from the List )
23. Duplicate the 4 Selected (Grouped ) MOVIE CLIPS and goto Modify > Transform > Flip Horizontal from the Menu to create a MIRROR IMAGE of the set of 4 clips, Position them like the Pic Below....

Now Press Ctrl+Enter to Test your Kaliedascope Movie, If you are successfull it will work as it should.
Save your Movie to your Harddrive or External drive and press Ctrl+Enter again to Publish your Movie
Goto where you have saved it and double click in the Flash.SWF File to run it.
And thats it, You can now add these to your website or do whatever you like with it.
Hope you all enjoyed this tutorial.
Chris
You do not have the required permissions to view the files attached to this post.

1 post
Page 1 of 1
Copyright Information
Copyright © Codenstuff.com 2020 - 2023