How To make a Image "Pixelator" Code Updated
Heres your chance to share your own tutorials with the community. Just post them on here. If your lucky they may even be posted on the main site.
6 posts
Page 1 of 1


Quick Profile
Information
Posts: 727
Joined: Thu May 20, 2010 10:32 am View Full Profile
hi all today i will make a tutorial on how to distort "Pixelate" a selected area of a picture.
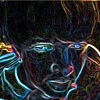
what does this do: When you Hold click on your mouse and move it on the picture it will draw a cool rectangle and it wil "Pixelate" the selected area
Before After Note:
* Not all of the code is mine.
* This wont work with PNG images i mean it will work but it will have some nasty side effects
* Name the controls as specified in the tutorial
1. Create a new project and call it whatever you want
2. add a MenuStrip and name it "MainMenu1" with the Following items
File
Open "mnuFileOpen"
Save "mnuFileSave"
Data
Reset "mnuDataReset"
3. Add a OpenFileDialog and name it "dlgOpenPicture"
4. Add a SaveFileDialog and name it "dlgSavePicture"
5. Add a PictureBox and name it "picCanvas"
Now the coding:
Import This first
Double click on the RESET Button and write this code
That's it i hope you like it
Please don't post comments like: "I've seen this before" , "It remembers me of..." , "I found this on..."
as i said at the top of my tutorial this codes are not all mine.
what does this do: When you Hold click on your mouse and move it on the picture it will draw a cool rectangle and it wil "Pixelate" the selected area
Before After Note:
* Not all of the code is mine.
* This wont work with PNG images i mean it will work but it will have some nasty side effects
* Name the controls as specified in the tutorial
1. Create a new project and call it whatever you want
2. add a MenuStrip and name it "MainMenu1" with the Following items
File
Open "mnuFileOpen"
Save "mnuFileSave"
Data
Reset "mnuDataReset"
3. Add a OpenFileDialog and name it "dlgOpenPicture"
4. Add a SaveFileDialog and name it "dlgSavePicture"
5. Add a PictureBox and name it "picCanvas"
Now the coding:
Import This first
Code: Select all
Under your Public Class Form1 write this code
Imports System.MathCode: Select all
on your form_load event write this code
Private m_OriginalBitmap As Bitmap
    Private m_CurrentBitmap As Bitmap
    Private m_TempBitmap As Bitmap
    Private m_Gr As Graphics
    Private m_Pen As Pen

    Private m_SelectingArea As Boolean
    Private m_X1 As Integer
Private m_Y1 As IntegerCode: Select all
Double click on the OPEN button and write this code
' Set the initial directory for dialogs.
        Dim init_dir As String = Application.StartupPath
        If init_dir.EndsWith("\bin") Then init_dir = init_dir.Substring(0, init_dir.Length - 4)
        dlgOpenPicture.InitialDirectory = init_dir
dlgSavePicture.InitialDirectory = init_dirCode: Select all
Double click on the SAVE button and write this code
If dlgOpenPicture.ShowDialog() = DialogResult.OK Then
            Try
                Dim bm As New Bitmap(dlgOpenPicture.FileName)
                m_OriginalBitmap = New Bitmap(bm)
                m_CurrentBitmap = New Bitmap(bm)
                bm.Dispose()
                picCanvas.Image = m_CurrentBitmap
                dlgSavePicture.InitialDirectory = dlgOpenPicture.FileName

                ' Make the form big enough.
                Me.ClientSize = New Size(m_OriginalBitmap.Width, m_OriginalBitmap.Height)
            Catch ex As Exception
                MessageBox.Show(ex.Message)
            End Try
End IfCode: Select all
Ignore the eventual errors messages they will all be correctedIf dlgSavePicture.ShowDialog() = DialogResult.OK Then
Try
m_CurrentBitmap.Save(dlgSavePicture.FileName)
dlgOpenPicture.InitialDirectory = dlgSavePicture.FileName
Catch ex As Exception
MessageBox.Show(ex.Message)
End Try
End IfDouble click on the RESET Button and write this code
Code: Select all
now add to your picturebox the Mouse_Down event and write this code in it
If m_OriginalBitmap Is Nothing Then Exit Sub
        m_CurrentBitmap = New Bitmap(m_OriginalBitmap)
picCanvas.Image = m_CurrentBitmapCode: Select all
Add to your picturebox Mouse_Move event and write this code in it
' Make sure we have a picture loaded.
        If m_OriginalBitmap Is Nothing Then Exit Sub

        mnuDataReset.Enabled = False
        m_SelectingArea = True
        m_X1 = e.X
        m_Y1 = e.Y

        ' Make a copy of the current bitmap
        'and prepare to draw.
        m_TempBitmap = New Bitmap(m_CurrentBitmap)
        m_Gr = Graphics.FromImage(m_TempBitmap)
        m_Pen = New Pen(Color.Yellow)
m_Pen.DashStyle = Drawing2D.DashStyle.DashCode: Select all
Add to your picturebox Mouse_UP event and write this code in it
If Not m_SelectingArea Then Exit Sub

        ' Start with the current image.
        m_Gr.DrawImage(m_CurrentBitmap, 0, 0)

        ' Draw the new selection box.
        m_Gr.DrawRectangle(m_Pen, _
            Min(m_X1, e.X), _
            Min(m_Y1, e.Y), _
            Abs(e.X - m_X1), _
            Abs(e.Y - m_Y1))

        ' Display the result.
picCanvas.Image = m_TempBitmapCode: Select all
Now write this code after your last End Sub
If Not m_SelectingArea Then Exit Sub
        m_SelectingArea = False

        ' Make sure this point is on the picture.
        Dim x As Integer = e.X
        If x < 0 Then x = 0
        If x > m_OriginalBitmap.Width - 1 Then x = m_OriginalBitmap.Width - 1

        Dim y As Integer = e.Y
        If y < 0 Then y = 0
        If y > m_OriginalBitmap.Height - 1 Then y = m_OriginalBitmap.Height - 1

        ' Pixelate the selected area.
        PixelateArea( _
            Min(m_X1, x), _
            Min(m_Y1, y), _
            Abs(x - m_X1), _
            Abs(y - m_Y1))

        ' We're done drawing for now.
        m_Pen.Dispose()
        m_Gr.Dispose()
        m_TempBitmap.Dispose()

        m_Pen = Nothing
        m_Gr = Nothing
        m_TempBitmap = Nothing

mnuDataReset.Enabled = TrueCode: Select all
This should correct any errors ' Pixelate the area.
Private Sub PixelateArea(ByVal x As Integer, ByVal y As Integer, ByVal wid As Integer, ByVal hgt As Integer)
Const cell_wid As Integer = 10
Const cell_hgt As Integer = 10
' Start with the current image.
m_Gr.DrawImage(m_CurrentBitmap, 0, 0)
' Make x and y multiples of cell_wid/cell_hgt
' from the origin.
Dim new_x As Integer = cell_wid * Int(x \ cell_wid)
Dim new_y As Integer = cell_hgt * Int(y \ cell_hgt)
' Pixelate the selected area.
For x1 As Integer = new_x To x + wid Step cell_wid
For y1 As Integer = new_y To y + hgt Step cell_hgt
AverageRectangle(x1, y1, cell_wid, cell_hgt)
Next y1
Next x1
' Set the current bitmap to the result.
m_CurrentBitmap = New Bitmap(m_TempBitmap)
' Display the result.
picCanvas.Image = m_CurrentBitmap
End Sub
' Fill this rectangle with the average of its pixel values.
Private Sub AverageRectangle(ByVal x As Integer, ByVal y As Integer, ByVal wid As Integer, ByVal hgt As Integer)
' Make sure we don't exceed the image's bounds.
If x < 0 Then x = 0
If x + wid >= m_OriginalBitmap.Width Then
wid = m_OriginalBitmap.Width - x - 1
End If
If wid <= 0 Then Exit Sub
If y < 0 Then y = 0
If y + hgt >= m_OriginalBitmap.Height Then
hgt = m_OriginalBitmap.Height - y - 1
End If
If hgt <= 0 Then Exit Sub
' Get the total red, green, and blue values.
Dim clr As Color
Dim r As Integer
Dim g As Integer
Dim b As Integer
For i As Integer = 0 To hgt - 1
For j As Integer = 0 To wid - 1
clr = m_CurrentBitmap.GetPixel(x + j, y + i)
r += clr.R
g += clr.G
b += clr.B
Next j
Next i
' Calculate the averages.
r \= wid * hgt
g \= wid * hgt
b \= wid * hgt
' Set the pixel values.
Dim ave_brush As New SolidBrush(Color.FromArgb(255, r, g, b))
m_Gr.FillRectangle(ave_brush, x, y, wid, hgt)
ave_brush.Dispose()
End SubThat's it i hope you like it
Please don't post comments like: "I've seen this before" , "It remembers me of..." , "I found this on..."
as i said at the top of my tutorial this codes are not all mine.
You do not have the required permissions to view the files attached to this post.
Last edited by XTechVB on Sat Oct 23, 2010 4:57 am, edited 2 times in total.
You can find me on Facebook or on Skype mihai_92b

Quick Profile
Information
Posts: 1506
Joined: Fri Jan 01, 2010 2:30 pm View Full Profile
Cool! i have a much simpler way of mine that i used in my project "Mega Paint" that only uses one subroutine.
*This code requires Picturebox1, NumericUpDown2, and Button2
*This code requires Picturebox1, NumericUpDown2, and Button2
Code: Select all
great tutorial for pixilating parts of the image though! Private Sub Button2_Click(ByVal sender As System.Object, ByVal e As System.EventArgs) Handles Button2.Click
If NumericUpDown1.Value > PictureBox1.Width Or NumericUpDown1.Value > PictureBox1.Height Then
MsgBox("Value Must Be Less Than Image Width and Height")
GoTo SubEnd
End If
Me.Cursor = Cursors.WaitCursor
Saved = False
PictureBox1.Width = NumericUpDown1.Value * Int(PictureBox1.Width / NumericUpDown1.Value)
PictureBox1.Height = NumericUpDown1.Value * Int(PictureBox1.Height / NumericUpDown1.Value)
Dim NewBrush As SolidBrush = New SolidBrush(Color.White)
Dim bm As Bitmap = New Bitmap(PictureBox1.Image)
Dim gfx As Graphics = Graphics.FromImage(PictureBox1.Image)
gfx.Clear(Color.Transparent)
Dim Count As Integer
Dim A As Integer
Dim R As Integer
Dim G As Integer
Dim B As Integer
For Xa = 0 To PictureBox1.Width - 1 Step NumericUpDown1.Value
For Ya = 0 To PictureBox1.Height - 1 Step NumericUpDown1.Value
Count = 0
For X = Xa To Xa + NumericUpDown1.Value - 1
For Y = Ya To Ya + NumericUpDown1.Value - 1
A += bm.GetPixel(X, Y).A
R += bm.GetPixel(X, Y).R
G += bm.GetPixel(X, Y).G
B += bm.GetPixel(X, Y).B
Count += 1
Next
Next
A = A / Count
R = R / Count
G = G / Count
B = B / Count
If A > 255 Then A = 255 Else If A < 0 Then A = 0
If R > 255 Then R = 255 Else If R < 0 Then R = 0
If G > 255 Then G = 255 Else If G < 0 Then G = 0
If B > 255 Then B = 255 Else If B < 0 Then B = 0
NewBrush.Color = Color.FromArgb(A, R, G, B)
gfx.FillRectangle(NewBrush, Xa, Ya, NumericUpDown1.Value, NumericUpDown1.Value)
Next
Next
NumericUpDownCanvasWidth.Value = NumericUpDown1.Value * Int(PictureBox1.Width / NumericUpDown1.Value)
NumericUpDownCanvasHeight.Value = NumericUpDown1.Value * Int(PictureBox1.Height / NumericUpDown1.Value)
PictureBox1.Refresh()
Me.Cursor = Cursors.Default
SubEnd:
End Sub
Quick Profile
Information
Posts: 727
Joined: Thu May 20, 2010 10:32 am View Full Profile
i know other methods on how to pixelate an entire image or by manually selecting the area (like yours with NumericUpDown or by textbox) but this is way much better. In my opinion
You can find me on Facebook or on Skype mihai_92b
Quick Profile
Information
Posts: 656
Joined: Sun Apr 18, 2010 8:20 pm View Full Profile
i come out with 57 errors saying
Name 'm_OriginalBitmap' is not declared.
or
Name 'm_Gr' is not declared.
stuff like that
help
Name 'm_OriginalBitmap' is not declared.
or
Name 'm_Gr' is not declared.
stuff like that
help
Quick Profile
Information
Posts: 2592
Joined: Thu Mar 25, 2010 4:36 am View Full Profile
Nice one bro!
Quick Profile
Information
Posts: 727
Joined: Thu May 20, 2010 10:32 am View Full Profile
Bogoh67 wrote:i come out with 57 errors sayingSory guys i forgot a piece of the code. Now i've updated the tutorial try it againg to see if it works if not i will post the source code
Name 'm_OriginalBitmap' is not declared.
or
Name 'm_Gr' is not declared.
stuff like that
help
You can find me on Facebook or on Skype mihai_92b
6 posts
Page 1 of 1
Copyright Information
Copyright © Codenstuff.com 2020 - 2023